Time piece
I finished this piece yesterday and I don’t have a clever name for it yet. But it was my first foray into metal leaf patterns and I thought some of my readers might be curious. I previously tested the metal leaf by covering a whole mdf with it and painting on top, and while it was interesting, I decided that I’d rather paint on the mdf and use the metal leaf as accent.
This watch has quite a history, it used to belong to my boyfriend’s grand-father who worked on a railroad. The highlights on the glass are all speckled because the glass face has been worn so much, by being in pockets with change and keys and all kind of stuff. It’s broken now, but kept as a souvenir. A few months ago, I did a photo shoot with this watch, a more recent pocket watch of mine and other objects. This photo is one of those I took.
I also took many pictures of the painting process so I could walk you through it step by step.

Here is the prepared surface. It’s just mdf from the lumberyard covered with two coats of acrylic gloss medium/varnish. The mdf is smooth but somewhat soft, like suede and the paint does not glide on it. The varnish helps.

Here is my prepared photo clipped to the board. I covered the back with sienna colored Conté crayon and I will trace on the front to transfer the drawing.

This is the transferred drawing.

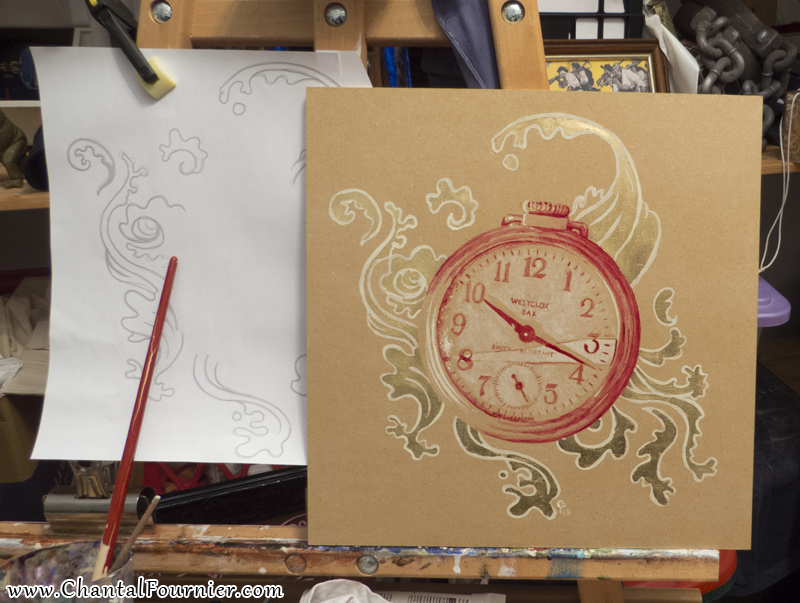
After the first pass of red paint. It was my first time using alizarin crimson in a painting like that. It’s not as dark as other colors I use, but I like it. Notice that the printed file clipped next to it is not the same one I used while tracing. This one takes into account the darker background. I treated it to make more of the image the same gray as the background, that way, I can use the color of the mdf as midtone.

After the first pass of unbleached titanium.

The rendering of the clock is done. Now I took a picture of the piece, put it in photoshop and painted ideas for the flourishes around it.

Here is the outline of the flourishes painted. You can see some of the white Conté on the red of the paint. This is wiped clean once the paint is dry.

Here I glued most of the metal leaf and started brushing the extra bits away. I use regular metal leaf, not gold, so it’s a bit thicker and sturdier to work with (not to mention cheaper.) The way it works is I put some gilding glue in the spots where I want gold and I wait for it to get tacky. Then I place bits of metal leaf on top and burnish with a soft brush or my white cotton gloves. Then I use a stiff brush to remove the bits that are not glued in place.
With the extra bits all brushed away. I was pretty rough with the brush to give a distressed look to the metal. Next step was to give 3 coats of varnish.

There it is. All done.
Like many of the paintings I post here, this one is for sale. It’s 115$ (+ shipping) and it’s 12″x12″. You can see other paintings for sale in my catalogue. If you are interested or if you have any questions about the blog, you can contact me at chantal (at) chantalfournier.com

Looks beautiful :). Thanks for sharing the step-by-step! I’m keen to give it a try.
Thank you Suzanne, really, gilding doesn’t require all the stuff you see in tutorials that make it look super expensive. It’s a lot of fun.